What I Built After Quitting Amazon (Spoiler: It’s a Stock Scanner) — Part 2
Building your own: Step-by-step guide to running it on your own machine
📖 Stock Scanner Series:
- Part 1: Why I Built It
- Part 2: How to Run It (you are here)
- Part 3: How to Deploy It
- Part 4: Evolution from Prototype to Production
- Part 5: Bugs, Bottlenecks, and Breaking 1,000 msg/s
What this post covers
This guide walks you through two approaches to getting the stock scanner up and running:
- Quick Start using Docker Compose with pre-built public container images
- Building from source on your local machine so you can customize it
Quick Start
Here’s what we’ll do:
- Obtain an API key from Massive.com
- Add your API key to the Docker Compose file
- Run Docker Compose
- Launch the application and login
Obtain an API key from Massive.com
⚠️ HEADS UP: This doesn’t use free data.
I’m currently using a $200/month Stocks Advanced plan from Massive.com for real-time WebSocket data. A $29/month Stocks Starter plan might work, but the data is delayed 15 minutes. The free Stocks Basic plan won’t cut it — it lacks the WebSockets and Snapshots APIs that this system requires.
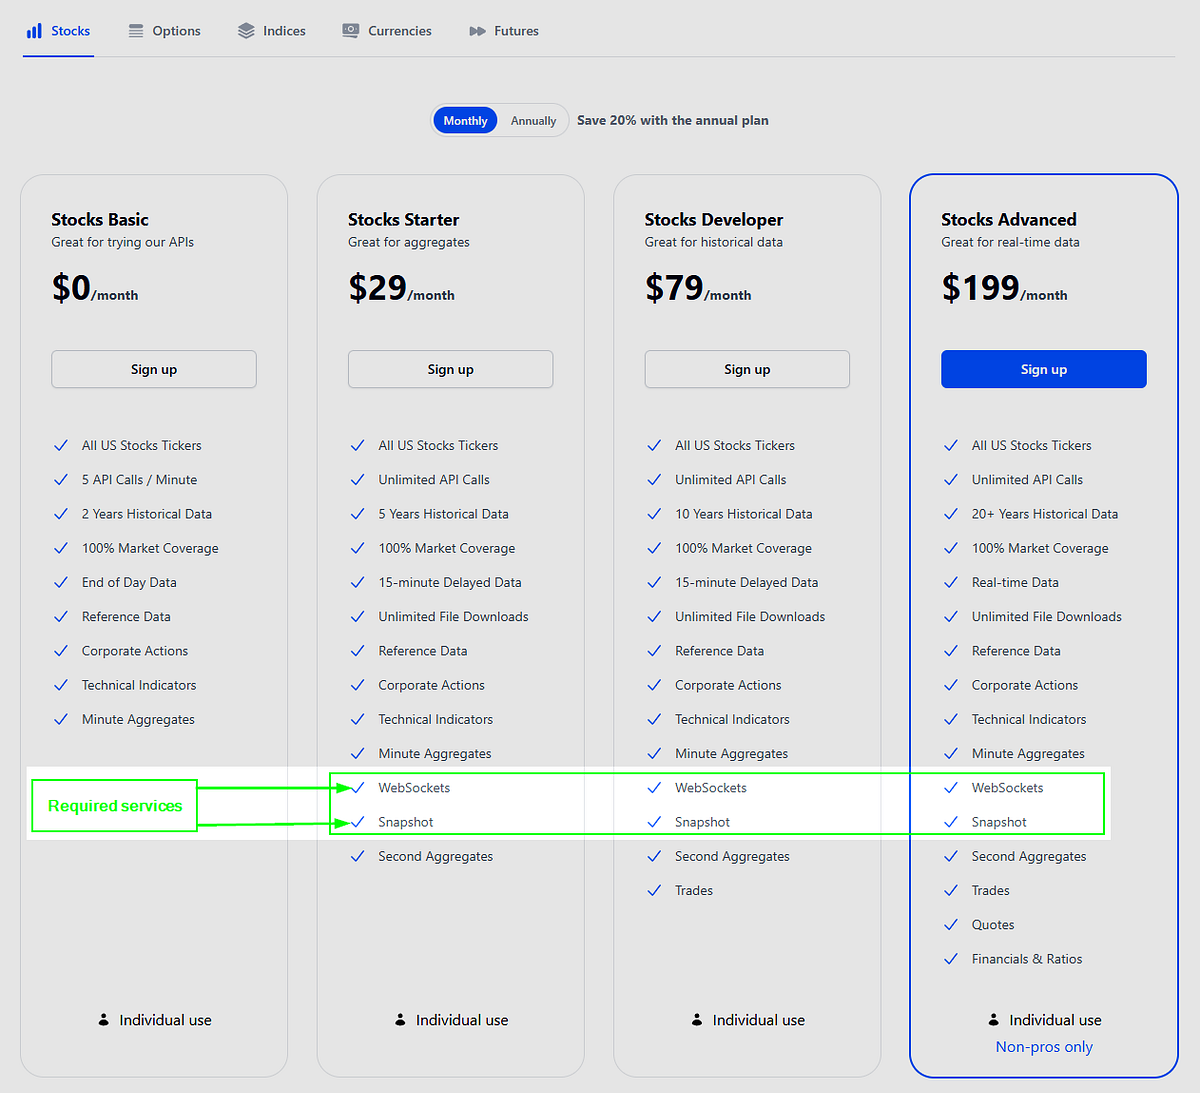
Massive.com pricing: Stocks Starter is the cheapest plan with the required services WebSockets and Snapshots.
Pricing breakdown: The Stocks Starter is the cheapest plan with the required services (WebSockets and Snapshots). The Stocks Basic plan lacks WebSockets and Snapshots, which are both critical. The Market Data Listener connects via WebSocket, and the Market Data Processor calls the Snapshots API when processing market data.
Sign up (if you haven’t already) and grab your API key from the Massive.com dashboard
Set up the Docker Compose file
Create a file named compose.yaml and paste this content into it.
compose.yaml
services:
  mdc:
    image: redis/redis-stack:latest
    container_name: mdc
    ports:
      - "6379:6379"
Important: Add your Massive API key to the
MASSIVE_API_KEYenvironment variables for both themdlandmdpcontainers, then save the file.
Install Docker
Ensure you have Docker Desktop (Mac, Windows, & Linux) or docker and the compose plugin (Linux only) installed. Follow the appropriate documentation for your machine architecture.
Run the containers
Once Docker is installed, run these commands:
docker compose -f compose.yaml build;
docker compose -f compose.yaml up -d --remove-orphans;
You should see output similar to this in your terminal after successfully running the Docker Compose commands:
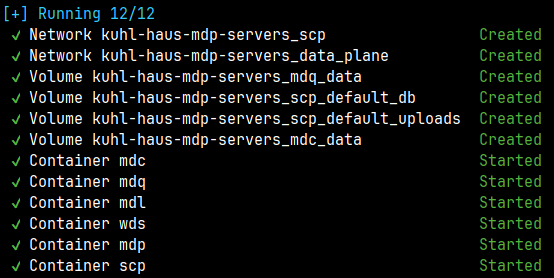
Screenshot: Command-line interface after successfully running the docker compose commands
Login to the web app
Once the scp container has successfully started, open the container logs and navigate to http://localhost:8000.
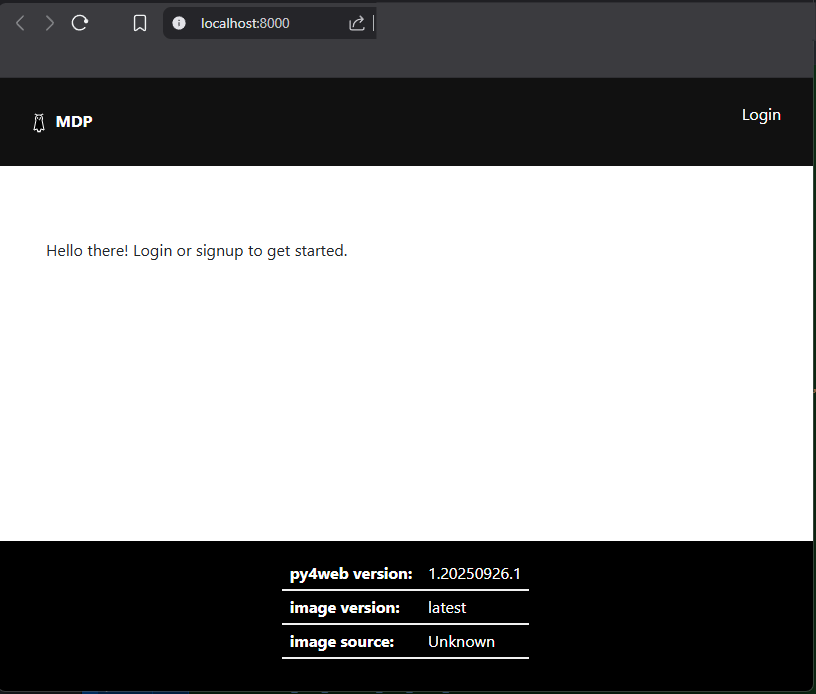
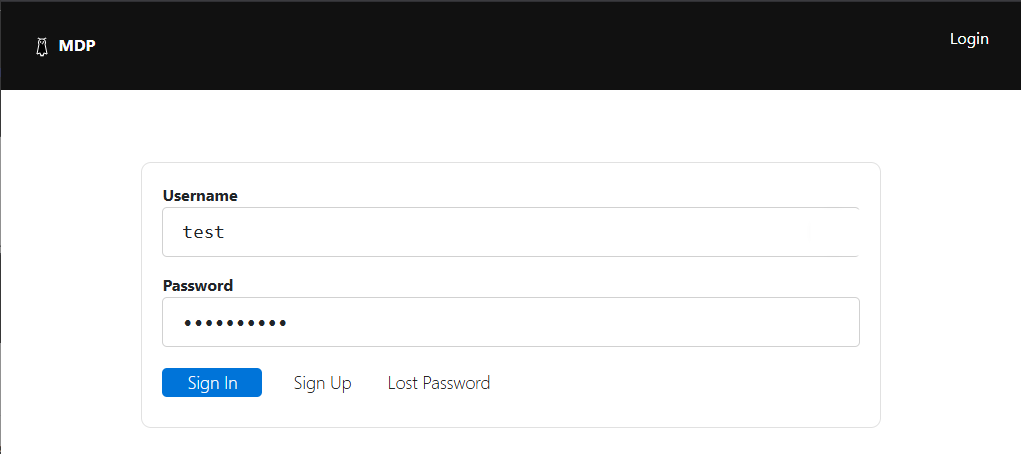
Screenshot: Login page
Authentication is enabled using the default username/password scheme. Other login options are available and can be configured using py4web environment variables. Refer to the py4web documentation for details.
To sign up, hover over ‘Login’ and click ‘Sign Up’.
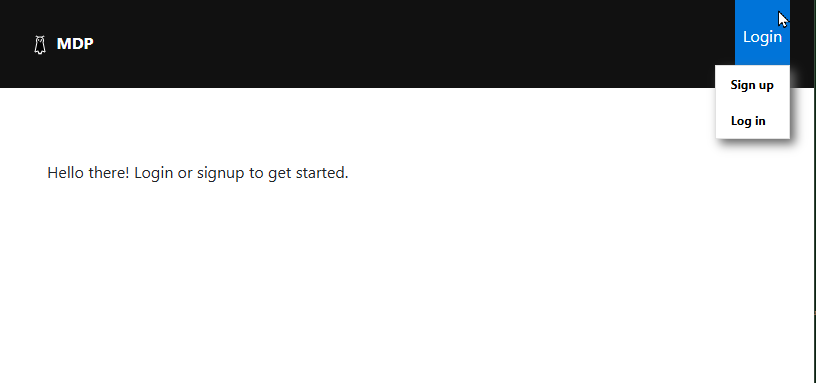
Screenshot: Click ‘Sign up’ to create a user account
Enter a username and password you can remember, then click ‘Sign Up’.
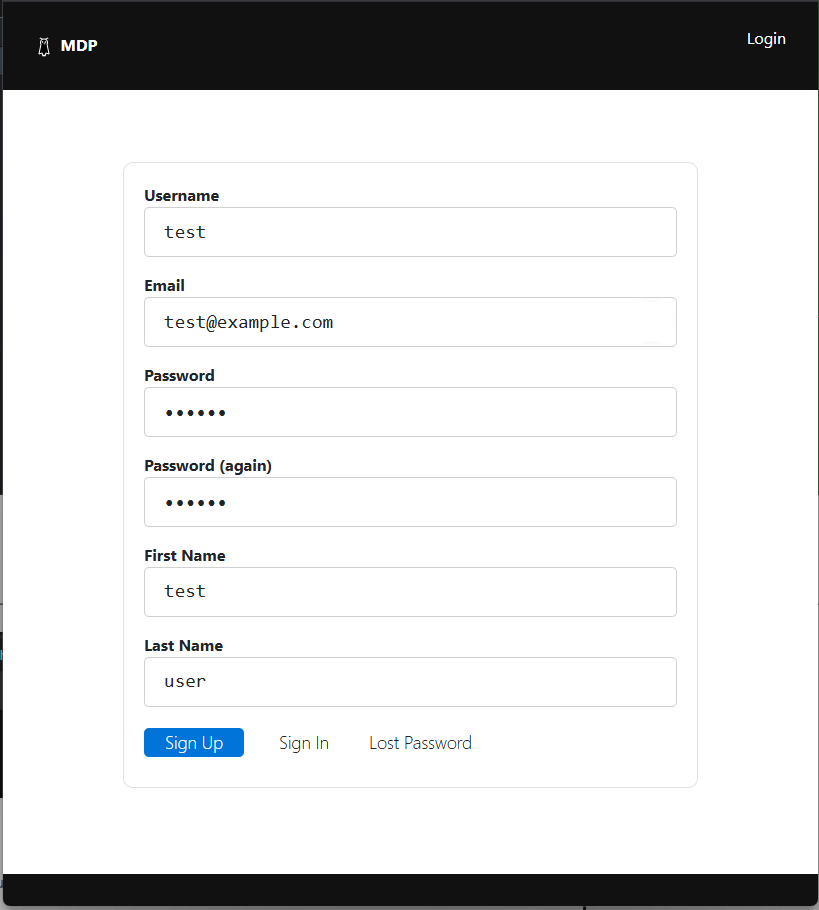
Screenshot: New user sign up form
You should see a “User registered” message if your signup was successful.
Screenshot: Message after new user successfully registered
Verify your email
Check the container logs for the scp container and open the verification link in your browser.
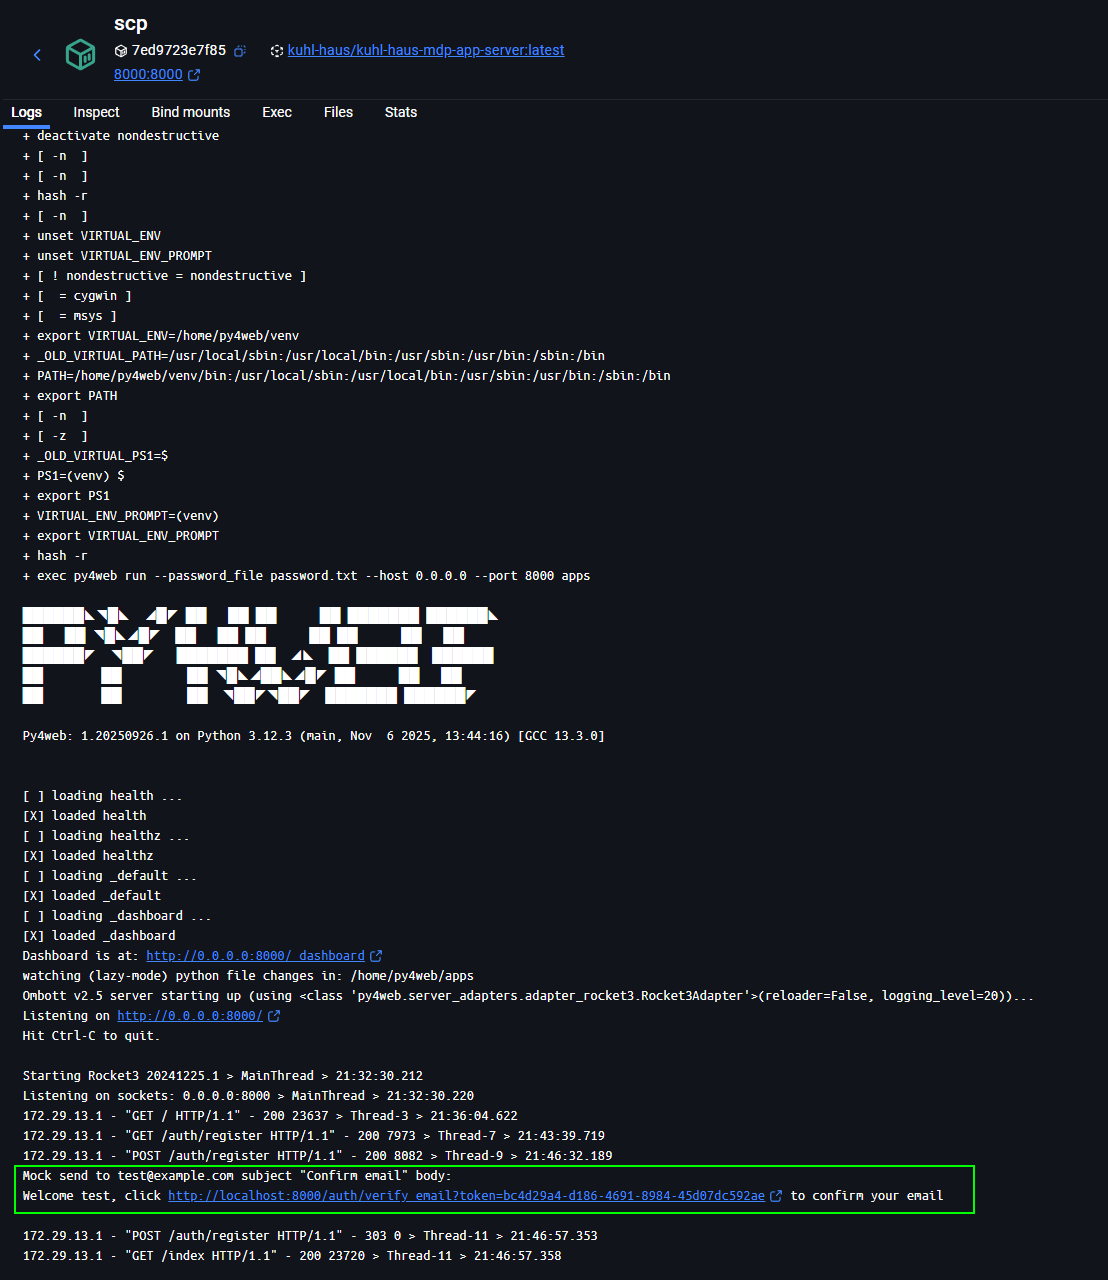
Screenshot: Console logs showing test@example.com mock confirmation email link
After navigating to the verification link, an “Email verified” message will be displayed. Now you’re ready to log in!
Screenshot: Message after successful email verification
Screenshot: Sign in form
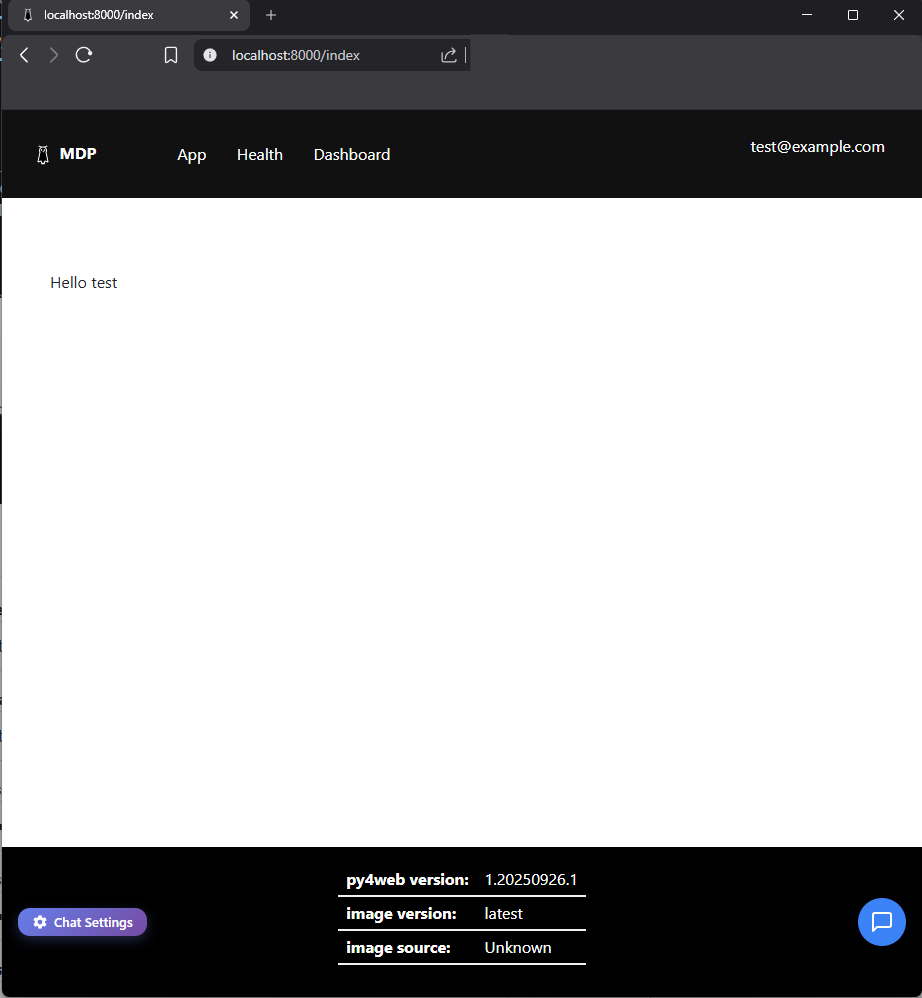
Screenshot: Home page after successful login
Site Tour
Once logged in, you’ll see three links in the navigation bar: App, Health, and Dashboard.
App
Launches the stock scanner — a Vue.js-based single-page application that displays market data via three drag-and-drop widgets: TopGainers, TopGappers, and TopVolume. I described these widgets in detail in Part 1 of this series.
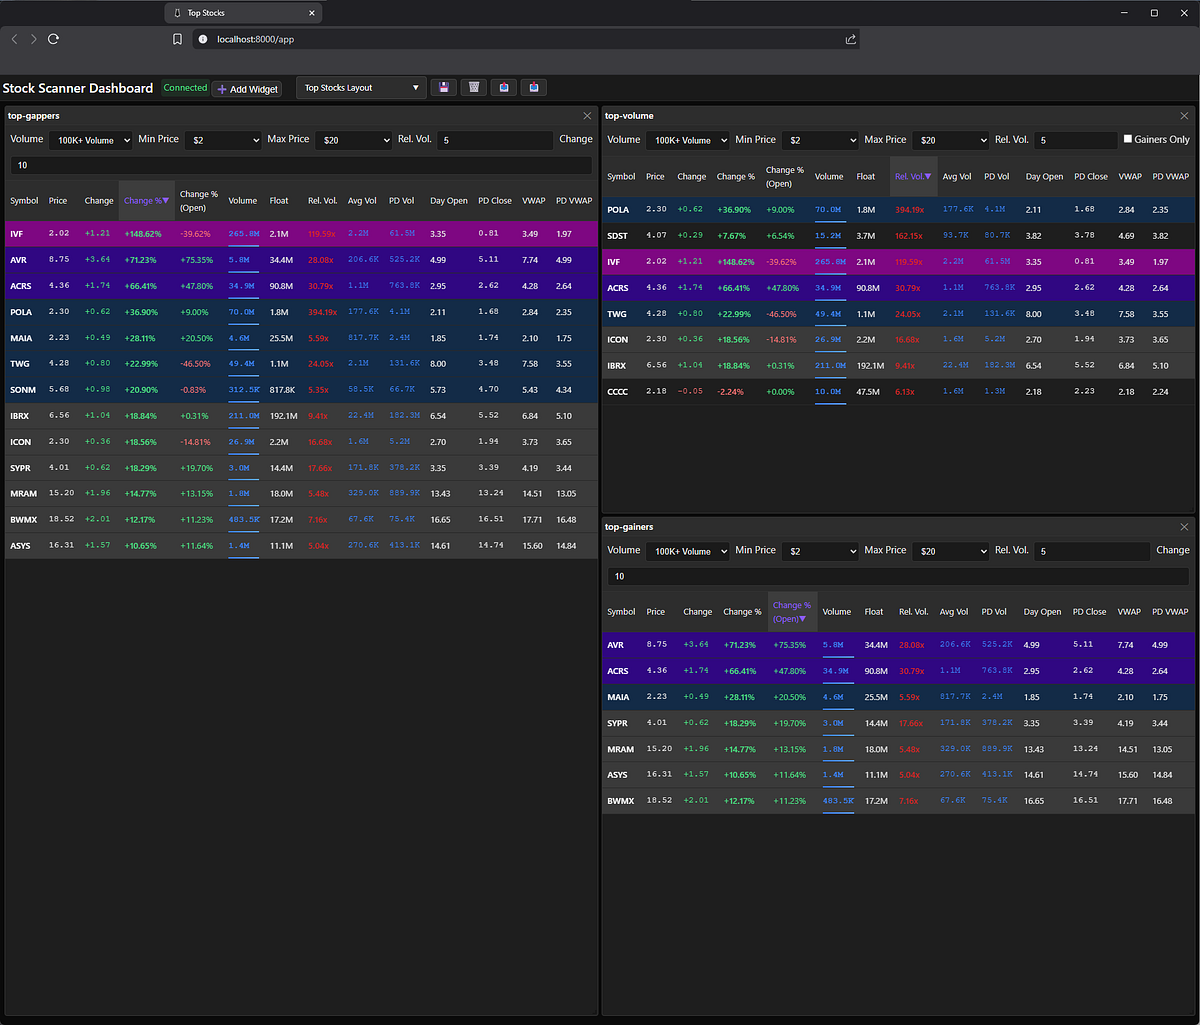
Screenshot: Application showing all three widgets displayed
Health
Health check URL emits JSON with the container image source, image version, health status, and Py4web version.
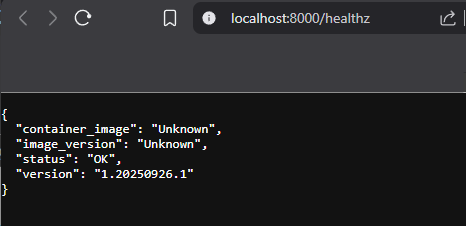
Screenshot: health check at /healthz returns JSON
Note: Don’t worry if
container_imageandimage_versionshow as Unknown on your local machine—that’s totally normal. I’ll dive deeper into what these mean in an upcoming post about production deployment strategies.
Dashboard
This the py4web dashboard. It’s used to manage applications and databases. More information is available in the py4web documentation.

Screenshot: Dashboard login page — default password is ‘changeme’
Login to the dashboard using the default password changeme. I’ll cover how to change this password later in this post.
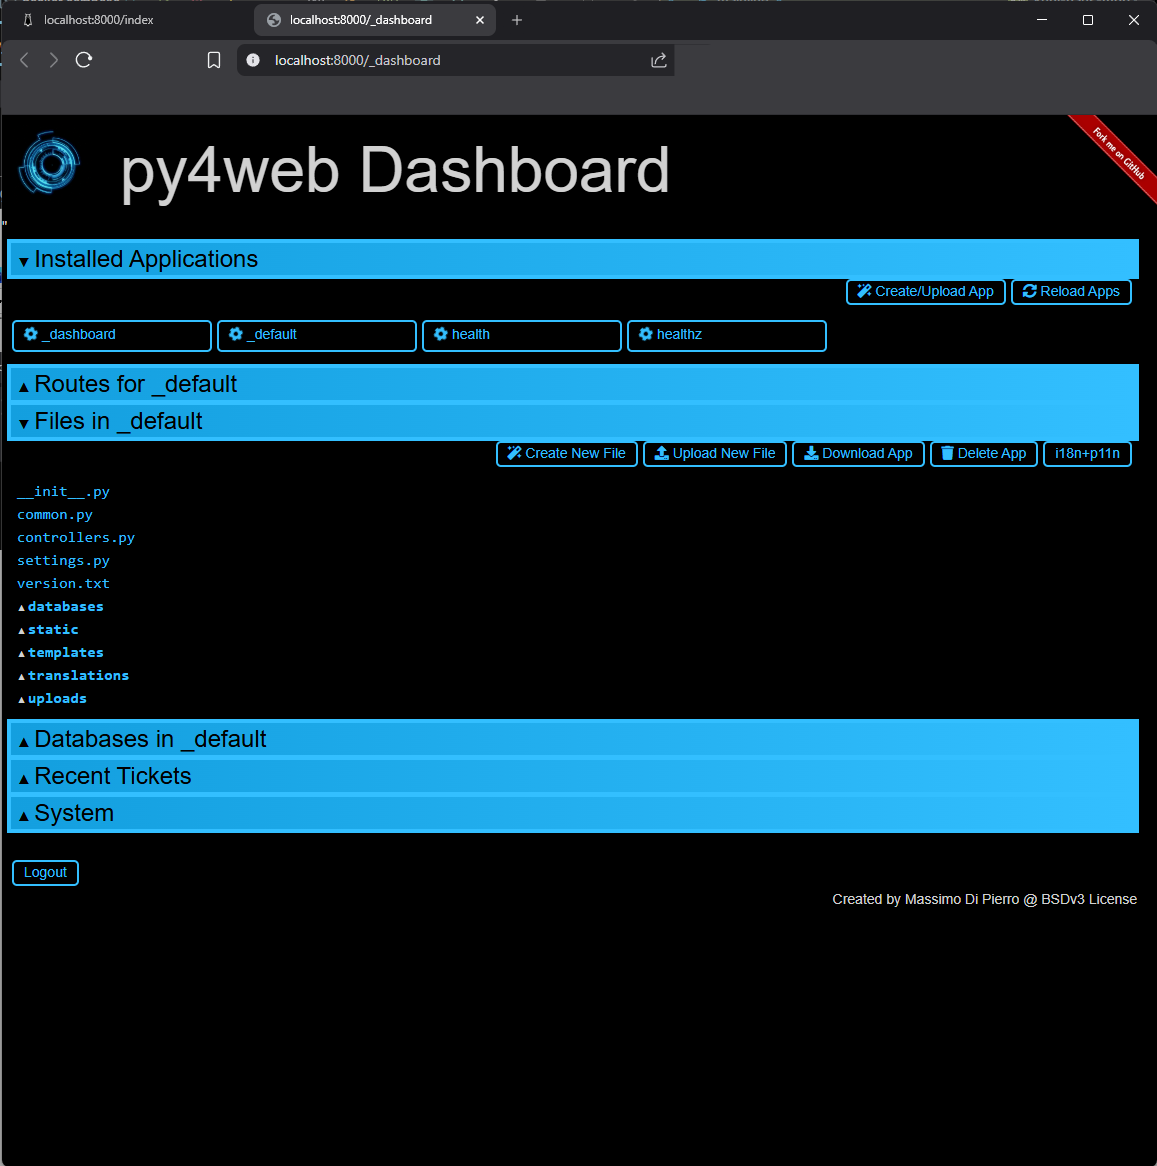
Screenshot: Dashboard opened to _default application
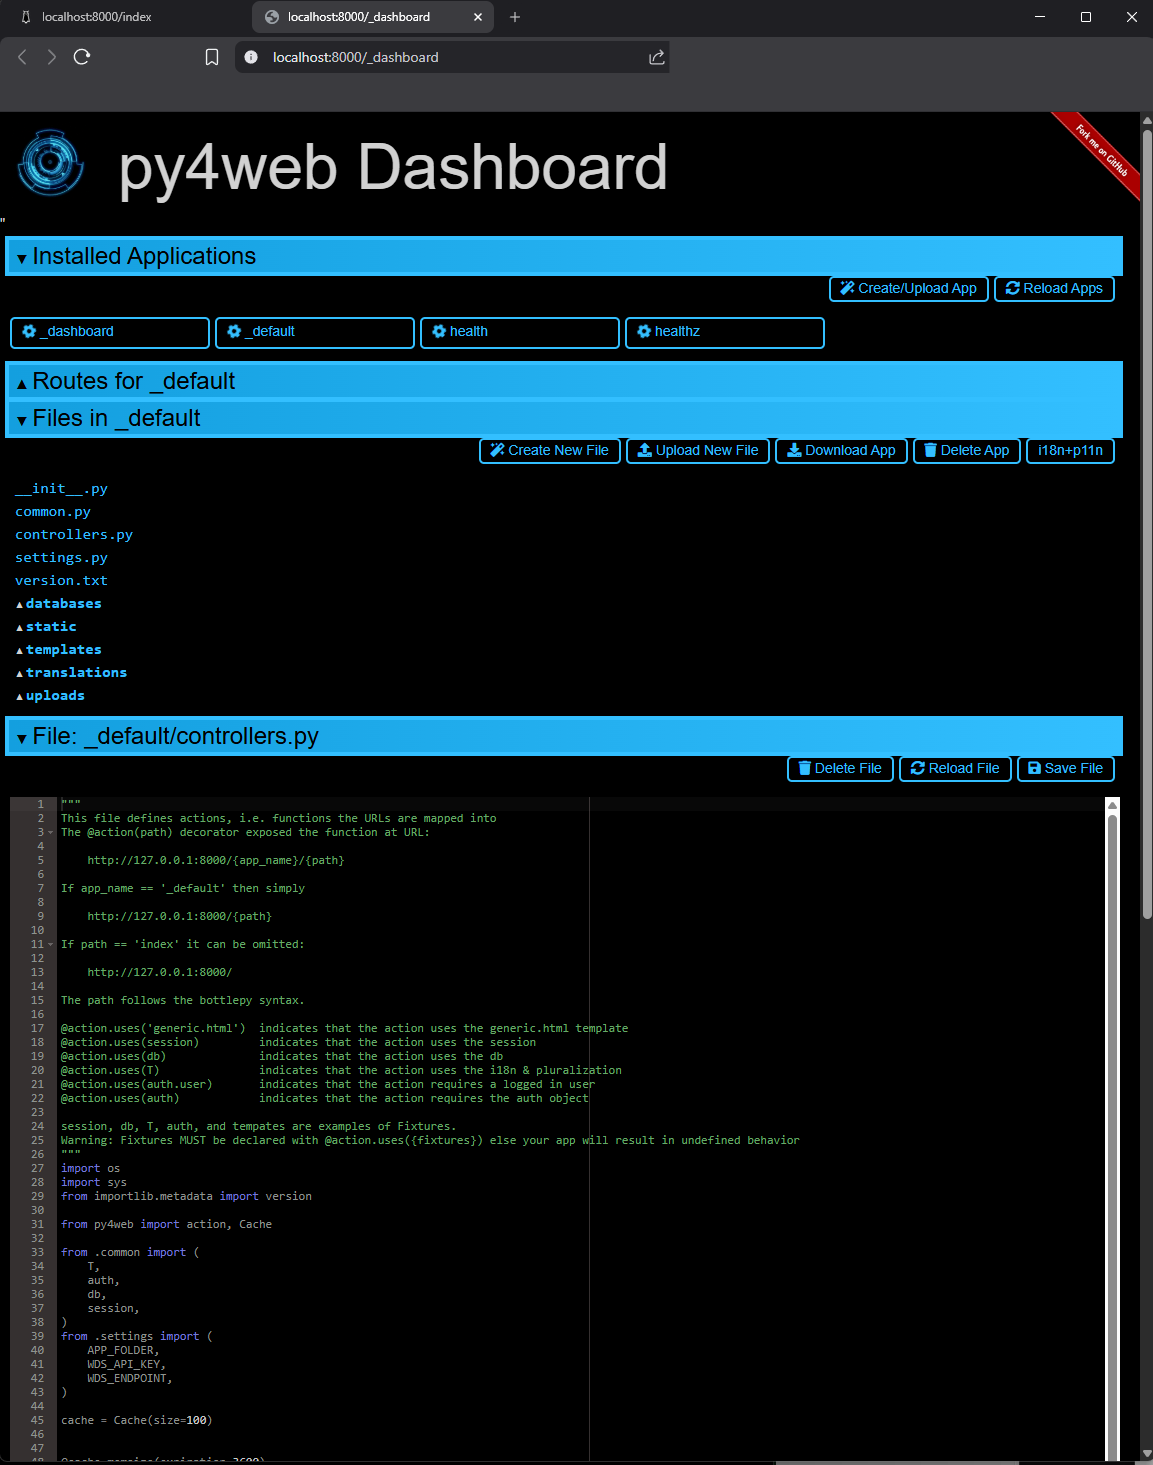
Screenshot: Dashboard displaying the contents of _default/controllers.py
Bonus: Embedded Chatbot (Optional)
You might also notice the ‘chat settings’ icon and chat dialog in the footer. This is a chatbot that uses the Langflow embedded chat component. I wrote about using Langflow in one of my previous posts.
This feature simply gives me access to my Langflow server via an embedded chat interface. It’s purely optional and has zero integration with the rest of the application.
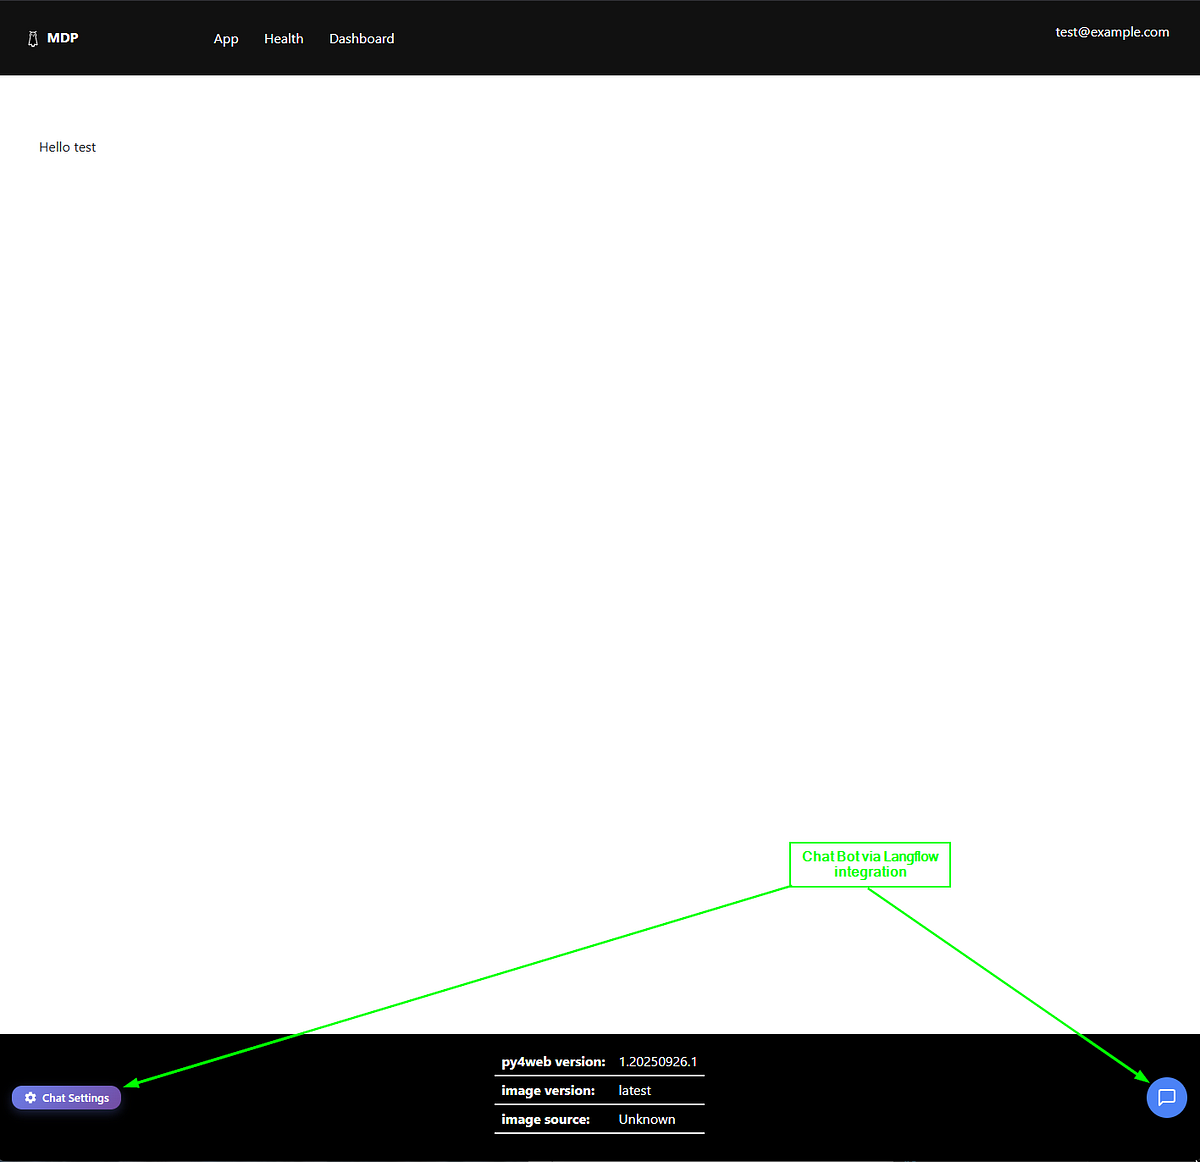
Screenshot: Home page with arrows indicating chatbot integration features
If you happen to have a Langflow instance, open the chat settings and enter the Langflow Host URL, Flow ID, and API key in the dialog, then click ‘Save Settings’.
All settings are stored in your local browser using the Web Storage API— they never leave your machine. (Source code is available here.)
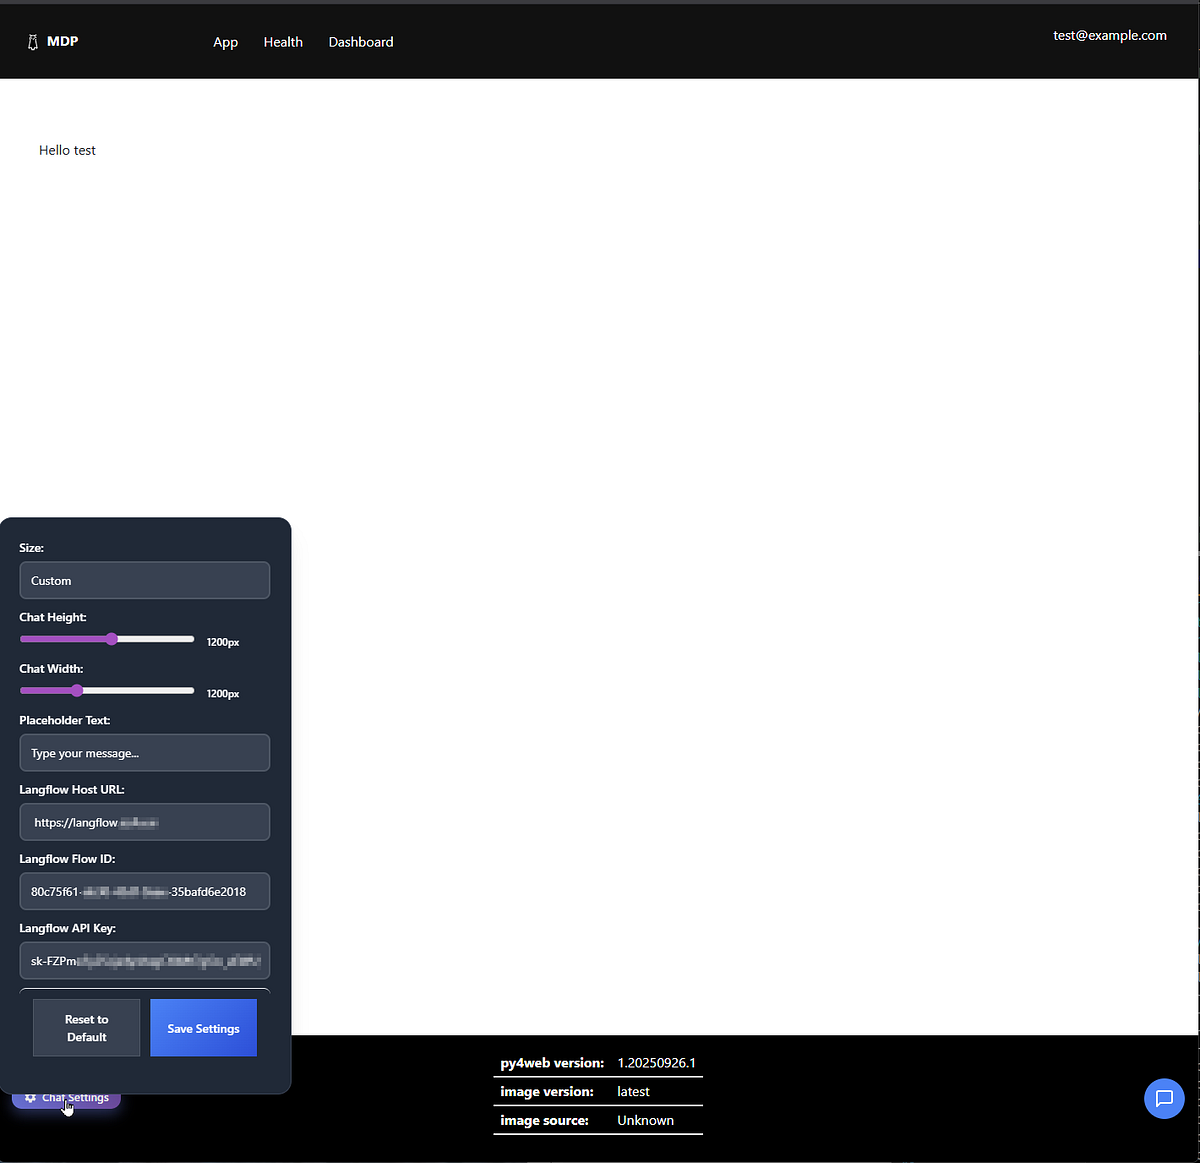
Screenshot: Langflow chat settings dialog
Changing the py4web dashboard password
The application server runs on top of py4web. Access to the dashboard is secured with a password created during setup. However, to create a runnable container image, you must skip the setup step and provide the dashboard password via the --password-file option to the py4web run command. (ref)
⚠️ Security Note: The container images (packages) published by the kuhl-haus-mdp-app repository should only be used for local development or demonstration purposes. The default dashboard password is changeme and, ironically, cannot be changed because the image is immutable. Therefore, you should create your own image with a custom password.
Changing the password involves a three-step procedure:
- Create a Dockerfile
- Generate a new password hash
- Create a new container image
Step 1: Create a Dockerfile
Create a Dockerfile with these contents:
ARG BASE_IMAGE=ghcr.io/kuhl-haus/kuhl-haus-mdp-app-server:latest

FROM ${BASE_IMAGE}

ARG user=py4web

USER root
COPY password.txt /home/$user/
RUN chown "${user}:${user}" /home/$user/password.txt

EXPOSE 8000

USER $user
WORKDIR /home/$user/
ENTRYPOINT ["/home/py4web/app-entrypoint.sh"]
Step 2: Generate a new password hash
Run the following command to generate a hashed password:
python -c "from pydal.validators import CRYPT; open('password.txt','w').write(str(CRYPT()(input('password:'))[0]))"
You’ll be prompted to enter your desired password. The command uses pydal’s CRYPT validator to hash it securely.
Example: Running the command and entering changeme as the password:

Screenshot: Terminal showing password prompt and password.txt file creation
The resulting password.txt file for changeme looks like this:
pbkdf2(1000,20,sha512)$91b9b70b2be5a2dd$281b6726ea440d8f53b559100142f35283c906bc
Step 3: Build the new container image
docker buildx build \
    --platform "linux/amd64" \
    -t "kuhl-haus-mdp-app-server:latest" \
    -f Dockerfile
Important: Once you’ve built this image locally, update your compose.yaml file to reference your local image tag instead of the ghcr.io/kuhl-haus/ registry image. The scp service section should now use:
scp:
  user: "999:999"
  container_name: scp
  image: kuhl-haus-mdp-app-server:latest  # Your local image
  # ... rest of the configuration
After updating the compose file, restart your containers:
docker compose -f compose.yaml down
docker compose -f compose.yaml up -d
Now you can access the dashboard at /_dashboard using your new password instead of the default changeme.
Building Images From Source
If you’re comfortable modifying source code and want to customize the scanner for your own trading strategies, building from source gives you complete control. Since the official images are built using public GitHub workflows, this section assumes you can follow along without exhaustive hand-holding.
Why build from source?
Building from source lets you:
- Customize the data processing logic for your specific strategies
- Modify widget calculations and ranking algorithms
- Add your own data sources or technical indicators
- Debug and troubleshoot with full visibility
Prerequisites
Make sure you have:
- GitHub CLI installed for easy repo cloning
- Docker buildx for building multi-platform images
Clone the repositories
The project is split across three repos:
- kuhl-haus-mdp — Core library with shared data processing logic
- kuhl-haus-mdp-servers — Backend services (listener, processor, widget service)
- kuhl-haus-mdp-app — Frontend application and web server
Clone them using the GitHub CLI:
gh repo clone kuhl-haus/kuhl-haus-mdp
gh repo clone kuhl-haus/kuhl-haus-mdp-servers
gh repo clone kuhl-haus/kuhl-haus-mdp-app
Building the MDP Library Image
The library image contains shared code used by all the server images. Build this first:
# Navigate to the kuhl-haus-mdp directory
cd kuhl-haus-mdp

docker buildx build \
    --platform "linux/amd64" \
    -t "kuhl-haus-mdp-lib:latest" \
    -f Dockerfile \
    --load "." \
    --build-arg IMAGE_VERSION="latest"
Building the MDP Server Images
Now build the three backend services. Each depends on the library image you just created.
# Navigate to the kuhl-haus-mdp-servers directory
cd kuhl-haus-mdp-servers

# Market Data Listener - connects to Massive.com WebSocket
docker buildx build \
    --platform "linux/amd64" \
    -t "kuhl-haus-mdl-server:latest" \
    -f mdl.Dockerfile \
    --load "." \
    --build-arg IMAGE_VERSION="latest" \
    --build-arg BASE_IMAGE="kuhl-haus-mdp-lib:latest"

# Market Data Processor - processes incoming market data
docker buildx build \
    --platform "linux/amd64" \
    -t "kuhl-haus-mdp-server:latest" \
    -f mdp.Dockerfile \
    --load "." \
    --build-arg IMAGE_VERSION="latest" \
    --build-arg BASE_IMAGE="kuhl-haus-mdp-lib:latest"

# Widget Data Service - serves data to the frontend
docker buildx build \
    --platform "linux/amd64" \
    -t "kuhl-haus-wds-server:latest" \
    -f wds.Dockerfile \
    --load "." \
    --build-arg IMAGE_VERSION="latest" \
    --build-arg BASE_IMAGE="kuhl-haus-mdp-lib:latest"
Building the Application Server Image
Finally, build the frontend application in two stages:
# Navigate to the kuhl-haus-mdp-app directory
cd kuhl-haus-mdp-app

# Base image with py4web installed on Ubuntu
docker buildx build \
    --platform "linux/amd64" \
    -t "kuhl-haus-mdp-app-server-base:latest" \
    -f py4web.Dockerfile \
    --load "." \
    --build-arg IMAGE_VERSION="latest"

# Final layer with the application code
docker buildx build \
    --platform "linux/amd64" \
    -t "kuhl-haus-mdp-app-server:latest" \
    -f app.Dockerfile \
    --load "." \
    --build-arg IMAGE_VERSION="latest" \
    --build-arg BASE_IMAGE="kuhl-haus-mdp-app-server-base:latest"
Note: Once you’ve built these images locally, update your
compose.yamlfile to reference your local image tags instead of theghcr.io/kuhl-haus/registry images.
What’s Next
This post covered two ways to get the scanner running on your local machine — using pre-built images or building from source. In upcoming posts, I’ll dive deeper into:
- The Market Data Processor internals — How I calculate relative volume, track daily statistics, and maintain top 500 rankings efficiently
- Deployment and infrastructure — Production deployment strategies and cost optimization techniques
- WebSocket challenges — Handling reconnections, backpressure, and ensuring data consistency in real-time streaming applications